Sunday, July 24, 2011

Day 14 7/24/11

Saturday brought a completely new look to our tiny cabin with tyvek and installation of the most of the windows.  My dad came over and helped me finish up the sophet and the we worked together on the tyvek.  Proof that two people make it easy than one.
We purchased our windows from the Millwork Outlet who is window and millwork supplier.  They have most of the standard stock sizes, but they also have a bone yard load with odd ball sizes or windows that were returned by contractors for a lesser price.  The five windows which were installed in the back end of the cabin, actually came off a new house construction site that contained a 38 window package.  All five windows are the same and were brand new.

The window below will be the window which will be centered over the kitchen sink.  It also came from the bone yard at the Millwork Outlet.  It was a little different as it did not have a normal window flange.  I needed to add the trim and then install the window on top of that.   This helped to give a little more reveal on the inside as well as creating a boundary for the siding to butt up to.

The only windows that did not get installed were the two dormer windows and the gable end window.  The were custom sizes and will be in next week.  There is still plenty to do on the inside, but I am wanting to get the door installed. 
It was a great day and once I get the rest of the roofing paper on the roof, I should be dried in.  I will cover the open window holes with plastic until the come in.  We put in 9 hours today (91 total man hours to date).

Friday, July 22, 2011

day 13 7/22/11

I finished the plywood on the roof today and I am one step closer to being  dried in. 
I framed in the gable end on front of the trailer. 
Plywood made the end wall look quite a bit taller.  I still need to finish the framing and plywood on the other gable end.

before the tyvek goes on, the window framing  gets a sill tape.
Since the facia is going to attach directly on top of the plywood, the tyvek was stapled on before the facia was installed.  I am hoping to have the entire cabin covered with tyvek by the end of tomorrow.  Also on the schedule tomorrow is to have the roofing paper on the roof as well and measure for roofing.  I worked 6 hours today. (total: 82 man hours)

Wednesday, July 20, 2011

Day 12 7/20/11

Our little cabin took on a whole new look today.  with the completion of the second and remaining dormer, the front side of our cabin is starting to take shape.


I ordered the windows for the dormers and the one going above the bathroom (in the loft) today.  Because they are custom windows, they will take 7-10 business days before I will see them.  I should have ordered them sooner as I am hoping to have the door and all other windows installed by the end of the weekend.  Of course I still have to sheet the other side of the roof and finish framing in the end walls.


Installing the trim has helped to transform the look.  Since the trim above dormers attaches right to the plywood, I will probably pull them off and get the tyvek under it.  All the trim is tacked on only for now.


I am still hopeful for a completion by the end of August, but I can see there is still so much to do.  I put in 7 more hours today.  (76 total man hours)

Tuesday, July 19, 2011

Day 11 7/19/11

I did do a little yesterday, but it was not a productive day and not enough to blog about for sure.  It was mostly spent racking my brain on the dormers that are giving my brain a workout on angles.  I think I made several cuts, but only screwed a few boards on.  too many mistakes!

Somebody decided to turn the light on today as the first dormer came together.  I did spend some non-working time this morning pricing windows that are still needed for the dormers and the one end wall.  My trip to lowes was also time consuming.  Their window department did not do much for me.  I did get the facia material that I will need to finish the roof today.  I picked out the OSB facia instead of the cedar because it is easy to work with and very uniform.

We decided to go with a 14" x 14" window in each dormer.  I couldn't size up the window until after the dormer was framed up, because I wasn't sure about the remaining space available.  I probably could have squeezed in a few more inches, but it looked good when it was done.


Once I got the window up and the plywood on the window area, I decided to put on the facia before I moved the scaffolding to the other end.  It took a lot of effort and probably too much time, but I am very happy with how the first dormer turned out.  The second will look just like the first of course only it will be on the other end.  I will have it completed tomorrow.  I worked 5 hours today plus 2 hours yesterday (total man hours 69 hours.)

 I am hoping to have all the plywood on the roof tomorrow with roofing paper down to dry everything up.  Am I too optimistic?

Sunday, July 17, 2011

Day 10 7/16/11


My Dad came over today and provide some extra man power as we started the rafter section today.  I started with a temporary board up the outside of the end wall to hold up the 2 x 6 peak which also breaks on the center post. 


Once I had a few rafters in place, I was able to remove the temporary board that once held the 2 x 6 peak.  The rafters went quite well and I was surprised that I was able to find a few very straight 2x6 for the peak.  I ended up going with a 7 ½ / 12 pitch.  This will keep me under the 13’6” total height I was trying to stay under. 

I will definitely be a crawling loft with the peak height at about  35” and 10” on the sides. 

The Dormers were and still are a bit challenging and not done, because I ran out of time.  I laid them out and decided to steepen the pitch to a 9 / 12 pitch so the won’t be quite so wide.  I will still need to measure and see what size windows they will hold.  I think I will end up customizing the window sizes as most places don’t have standard sizes that are that small.

The side without the dormers was a piece of cake.  Whose idea was it to put those things in!  All in all, we put in 11 man ours today and I am looking forward to have the plywood on and drying everything in!  (62 total man hours)

Tuesday, July 12, 2011

Day 9 7/12/11


Today I spent the day working on the loft joist and laying out where the access hole will go.  We decided to leave the end of the loft open to let in a little more light.  From below, it might give the appearance of more room on the end where the loft does not go all the way to the end. 

For structure, I added a second 2x6 and a spacer block to make a beam to go under the 4x4 center post in the loft area.  I secured this beam with 3-4”lag bolts on each end.   The 4x4 (not installed yet) will provide the needed structure to hold up the roof ridge 2x6.
I put in a temporary ladder through the access hole a put up a few sheets of plywood.  This will give me a good working platform for when I start the truss work.  I am still planning on a 8/12 pitch however I will redo the math and make adjustments where needed so I don't go over our goal height of 13'6".
I only put in 5 hours today bringing my total constuction time up to: (51 total hours)

I had an unexpected visitor today. 

Monday, July 11, 2011

Day 8 7/10/11

The sun has decided to come out one more time.  Today I finished the sheeting on the final side.  The sheeting goes all the way to the top plate on the side walls.  Since there will be more sheeting required on the gable ends, I did not rip a small piece to go up to the top plate.  It will add to the strength by using larger pieces of plywood. 

With all the plywood sheeting on, you can now really get the feel of the available space on the inside.  I image that when the loft joist are installed, it might a feel a little tighter on the inside. 

 I finished the day by using a can of “the great stuff” to fill in the areas around the wheel wells from the inside.  It should provide good insulation in the small gaps as well as a good sealer.  I will also use silicone around the outside of the wheel wells for extra protection from moister. 
The inside is really starting to take shape.  Here you can see the end where the main living area will be.


On the far end is the where the bathroom will be.  The shower on the left and toilet on the right.  It will be enclosed with a wall and 24" pocket sliding door.  Up next for our next day of work will be to put in out 2x6 loft joist.  Today I worked 4 hours ( 46 hour total).

Day 7 7/9/11


Today is Saturday and the building is totally framed including the top plate to tie everything together.  I got two pieces of plywood on the only un-sheeted side and the cabin has a very closed in look. 

From the inside it is feeling a little tighter than it did before the side walls were up.  I still need to level up the trailer every day.  I am not sure if it is settling more or just have weight shifted in different places, as walls are built, makes the leveling change.  I worked 7 hours today (42 hours total).

Day 6 7/8/11

The weather is perfect outside today for working on this Friday. 

My play today was to have the entry door side wall sheeted in plywood and I almost had it completed. 

Building a temporary scaffold was helpful for putting on the plywood as the structure is getting quite high.  The walls are already just over 10 feet high now.  I am still planning on an 8/12 pitch on the roof, but that might vary a little to keep my peek height under 13’6”.  The day was broken up with a trip to IKEA for interior ideas and also the millwork outlet to get a few more windows.  It was a nice break.  Aside from a few small filler pieces, the wall is done, screwed and glued.
I worked 6 hours today (37 hour total.)

Day 5 7/7/11


Today I framed the entry door wall and everything is starting to tie together nicely.  I built it in 2 sections on the ground and then drug them into position up on the trailer and lifted them into place without plywood.  Once up, I tied the two walls together and finished the framing that sits over the wheel wells.  I am trying to build in the space around the wheel wells so that I have good backing for the plywood as well as creating a boundary for filling with foam. 

Screwing the walls is proving to really draw out the time, especially when pre-drilling is needed so that you aren’t stripping the screws.  The Sidewall is framed and one sheet of plywood is on to hold the wall square.
It was another good day.  I worked 5 hours today (31 hours total)

Day 4 7/6/11

Even though I put in six hours on the cabin today, I would say only half of that was productive.  I spent a lot of time at Lowes today working on challenges associated with the plumbing (approx. 2 hours).  Due to all the steel in the framing, I am getting creative with putting some piping in the trailer.  The drains are not the challenge as much as getting the drain vents in.  On the constructive side, I was able to frame, glue, screw and stand the tongue end wall. 

It is looking longer having both end walls up.  I used angled 2 x 4’s for bracing to hold the end walls until the side walls are completed.   I will start tomorrow by re-checking the plumb on both end walls and then start the entry door side wall.  Tomorrow will give a new look to the trailer for sure.  6 hours today (total 26 hours).

Day 3 7/4/11

It seemed like I didn’t make a lot of progress today as I spent a lot of time repositioning the trailer because its current location would not allow for the height due to power and cable wires versus the finished height of the trailer (13'6" from the ground up).  After I moved the trailer, it had to be re-leveled. 


After building the first wall (the end wall furthest from the trailer hitch), it appears as I might need to re-level the trailer again as the ground has settled.  I squared up the wall and then glued and screwed the end wall plywood with 2” screws and liquid nail before we stood the wall up and it seems very solid. 

Even though the wall was going on the other end, there was no room to built it at of the wheel wells, so we built it on the front of the trailer and then slid it around to the other end and then stood up the wall.
Since I don't have access to the back of my house with a truck and trailer, I had to build it right in my front yard.  For security, I put on a hitch lock.  It put in 6 hours (Total hours 20). 


Day 2 6/25/11

Today is Sunday and it was another good day of work on the trailer.  After making a quick trip to Lowes for a few more boards, bolts and plastic, I was able to get started working just after nine this morning.  I started by finishing the perimeter with the remaining pressure treated 2x4’s I then decided to tie them together with carriage bolts for added strength.  

I priced out different types of insulation to put in the floor and we decided on the rigid foam.  Fiberglass was less expensive, but I feel the rigid foam will last longer and not get compressed.  We wanted to maximize the 3 1/2" space with a layer the spaceof 2” and 1”rigid foam, I am able to get about a R-13 insulation value.  The rigid foam is also mold and insect proof.  I cut the pieces tight enough to not need a foam filler around the edges.  I did add some of "the great stuff" foam around the wheel wells. 

Once this insulation was done, it was time to lay the T & G (tongue and groove) OSB plywood.  I used Liquid Nail on all the surface under the plywood and then screwed it with 2” screws.  The floor feels very solid. 

I was going to have a few days where I could not work on it and rain was in the forcast so I covered the trailer with plastic to protect the OSB plywood from swelling.  It was another good day.   8 hours today (14 hours total)

DAY 1 6/24/11

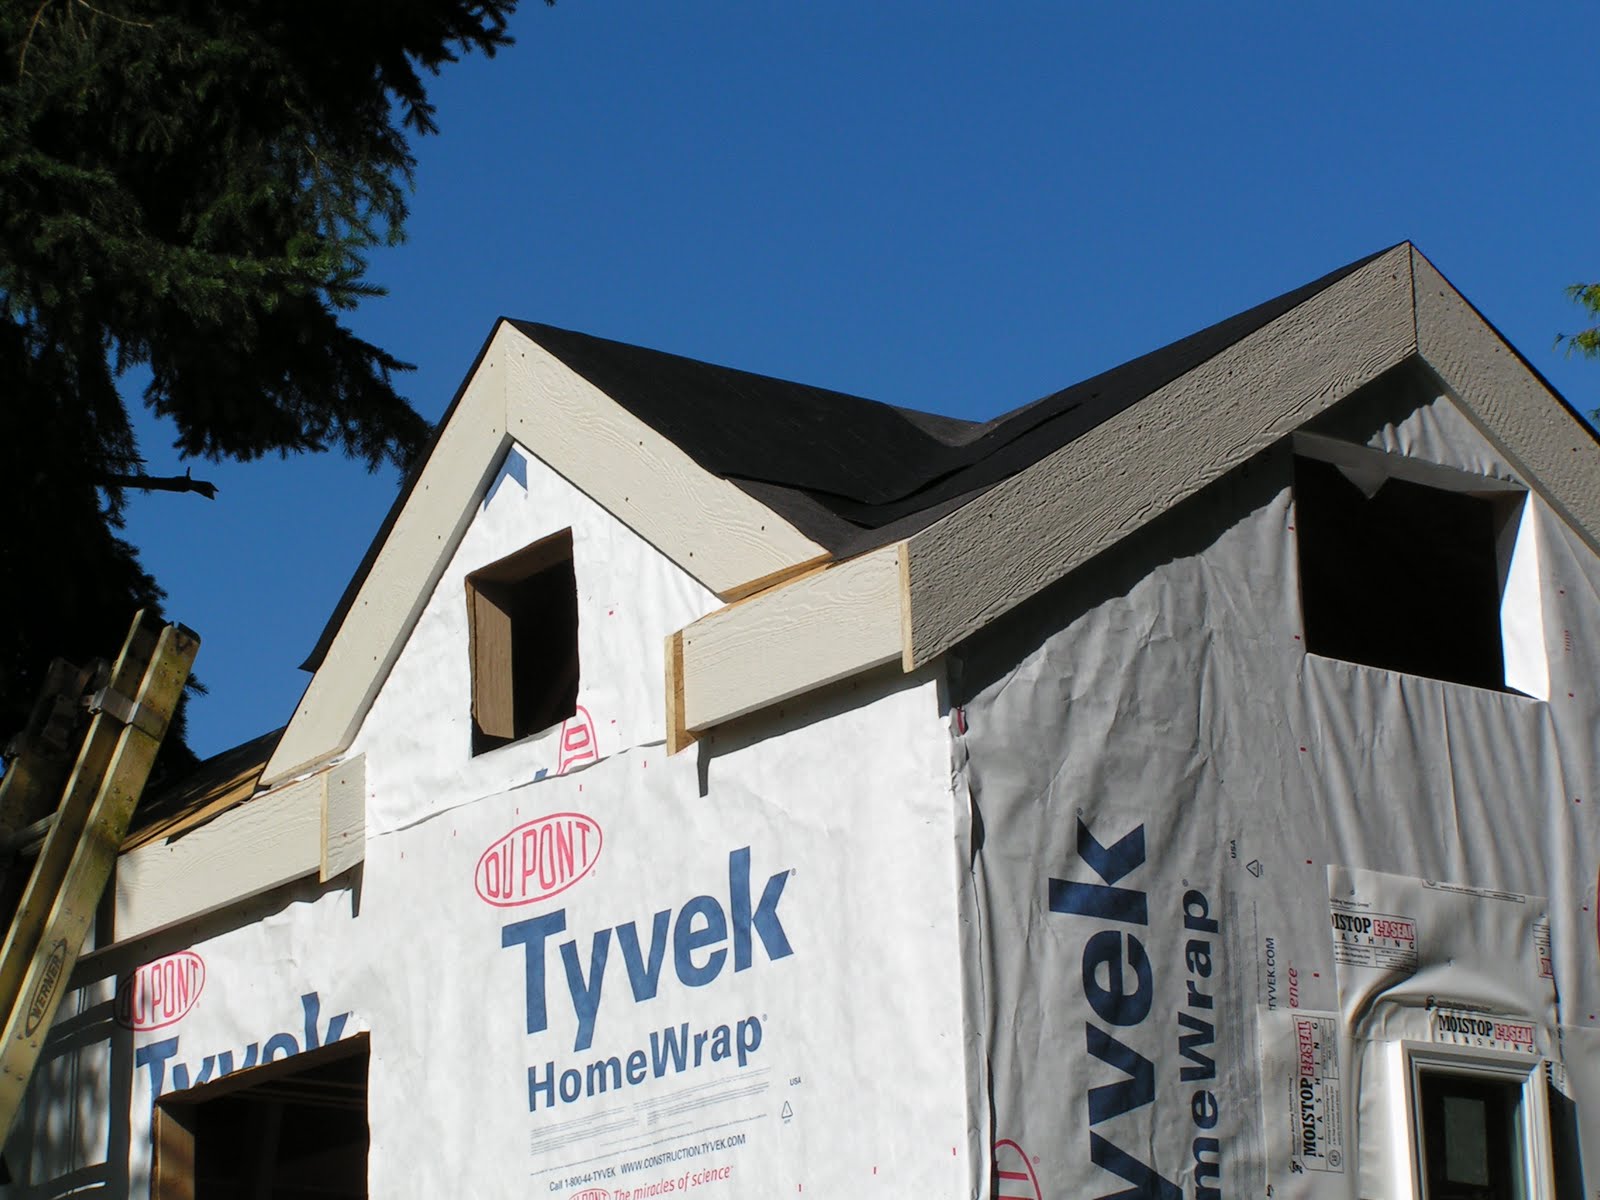
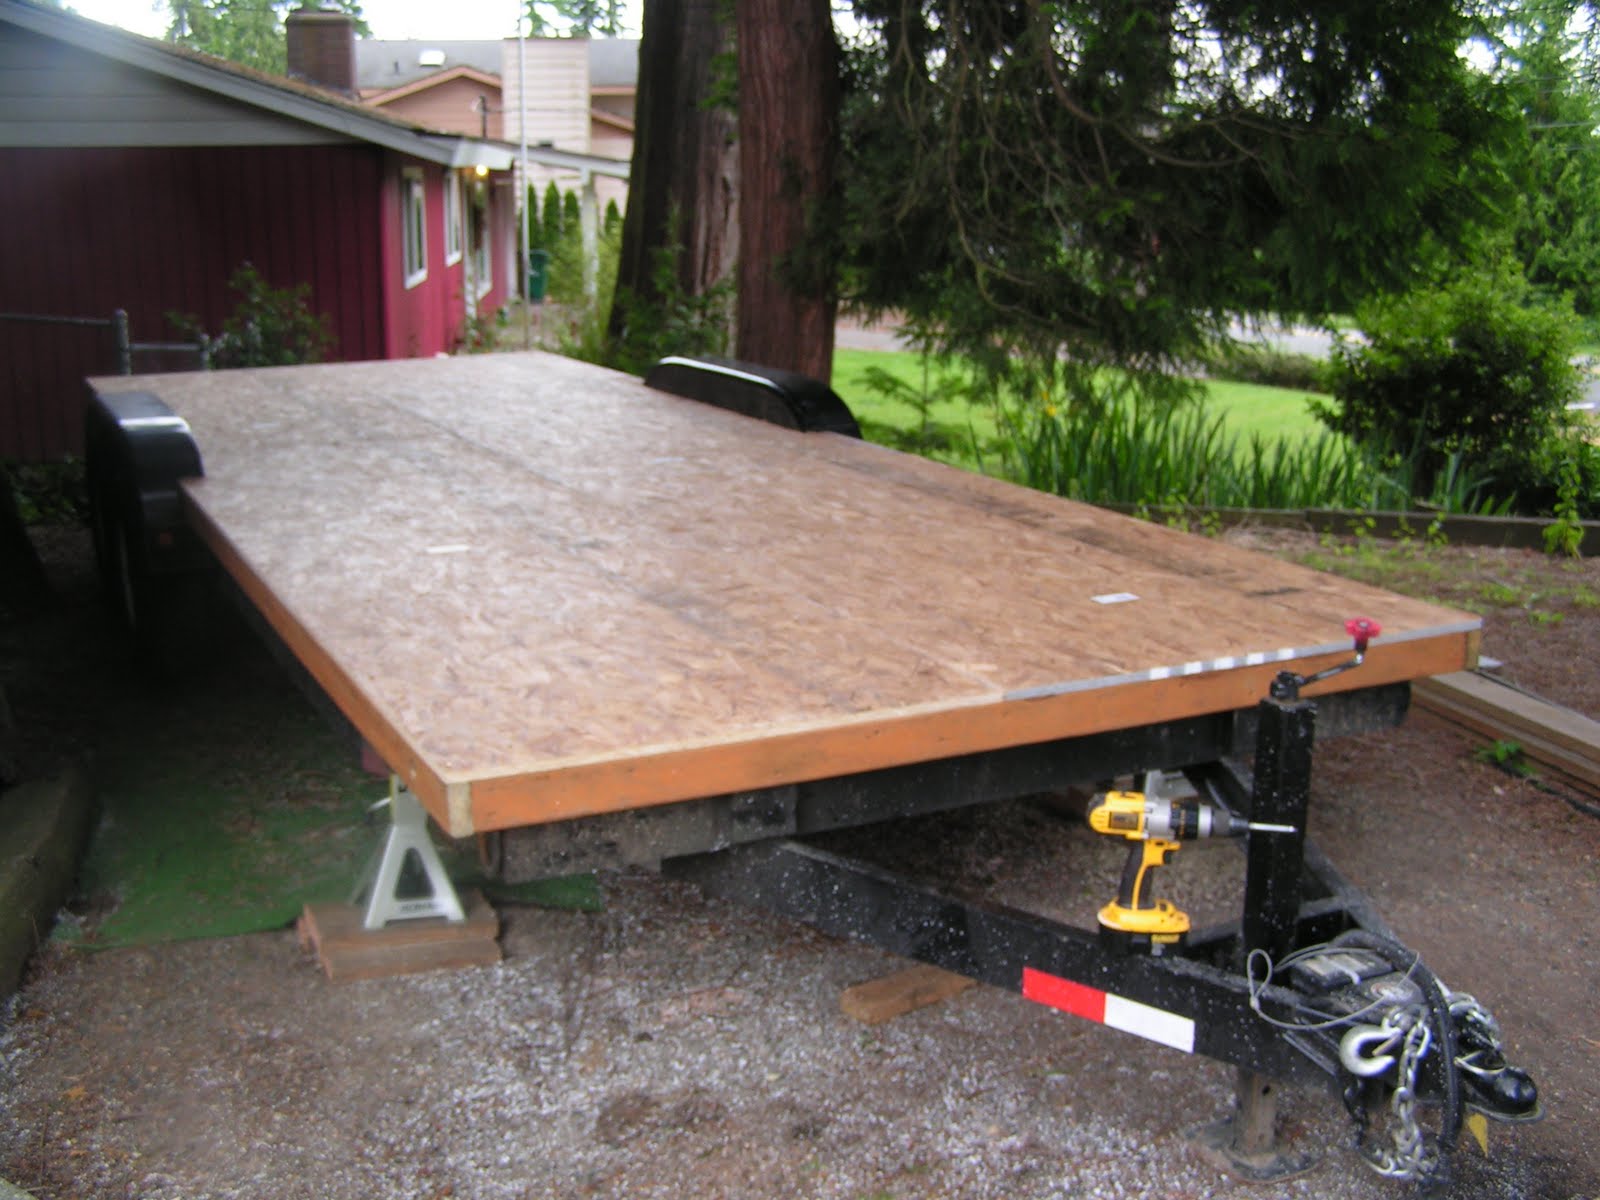
So, before I go into the first day of official work, I should give some additional info.  We, my wife and I, wanted to build a tiny house on wheels to use like a cabin for our family of four.  We went out and found the trailer that was going to work for us.  It is a 20' trailer with dual axles and a 10,000 lb max weight.  It has trailer brakes as well as emergency brakes.  Since we bought the trailer used (one year old), we had to cut some of the metal off of the trailer as it would interfere with building the cabin.  We also went out and made our first purchase of material which was enough to complete the floor finished in plywood.

Today is Friday and the first day of work on the “CABIN”.  I started by unscrewing every other plank as I will need to cut one of them up for ground supports under the jack stands. 

 I cut several one foot pieces and used them under the jack stands and leveled all four corners.  After checking the layout for the plumbing in the front of the cabin, I thought it would be easier to cut out a few areas where the toilet and shower drains are going to come down. 

I used some new flashing as well as some used flashing to cover the spaces between the plank boards that remained screwed down.  This will help to keep out the critters. 

I then covered the trailer with Black roofing paper to act as a moister barrier to the wood framing and just seal up everything from under the trailer to the floor. 

I cut and screwed together most of the floor joist on top of the paper and only bolted one third of them down to the plank boards as I ran out of time today.  Every floor joist is laid out on 16" centers  from the front of the finished floor and is getting three – 4” lag bolts and washers from the bottom of the plank boards up.  I used both my drill and an air ratchet to install the lag bolts from beneath the trailer.  This is time consuming as it is not easy to find your layout from beneath the trailer.  I missed a few times and had to re-drill to get the lag bolts into the center of the 2x4's.  It was a good first day and I am looking forward to another good day tomorrow.   6 hours worked today.  (Total: 6 hours)